Tuesday, November 25, 2008

Naming and conventions in XAML

I think the naming and code/markup conventions in XAML is a bit unclear. This post will raise some of the issues.

I posted a new thread in the Silverlight.net forums about why there is no PART_ convention in Silverlight when this convention exists in WPF. I described the problem like this:

"In WPF there is a convention for TemplateElements in controls that distinguishes controls that must exist in a template from other controls. This means that if I edit a control template I know that all elements named PART_* must be in the template and all other parts I can remove or do whatever I like to.

When I looked in Silverlight Toolkit and the shipped controls there are no such standard, why? How should the user know which controls that must be in the template? I think it is sad that the framework doesn't look the same in all parts (yes I know that the Silverlight Toolkit is not in the framework, but realize that it will be a template and a teacher for many control developers). Is there a reason?"

I did not get a clear answer for why they have made it this way but the replies made me realize that PART_ convention can probably not be entered in the future because this will break the released code. And on the other side, in WPF the PART_ convention can not be removed because that will break the WPF code. I think the problem is that the two so similar frameworks differ in conventions and readability. What about the problem?

Yes, I know about the TemplatePart attribute and I know that the functionality does not change because of the naming convention. I think that the problem is that the tools does not use this information today. Tools like Visual Studio and Blend will soon be consuming the attribute but there are a lot of other tools that won't. This brings us to my second opinion.

I think this is a usability and design issue. If you read Framework Design Guidelines (K. Cwalina, B. Abrams) they have an important point when they say that the .NET Framework should "look the same" wherever you are. Therefore I think its a bad thing that Silverlight and WPF differs. A developer should recognize himself/herself when adopting a new area within the framework, and the framework code should be clear and readable. This is not a big issue and maybe I'm whining a little bit too much about this, but I think it is important that we create conventions for markup (XAML) in the same way that we use camelCasing and PascalCasing in e.g. C#. I have seen some unclear naming within the framework (in XAML), are there any conventions for naming and so on and do people use them?

Another part that is related to this is how you should name your members in XAML. Your XAML-file are compiled into the same container as the code behind (in the case of a UserControl) and there they will be members of that class. This means that if you name e.g. a Button "MyButton" it will appear as a member of the class with a field name "MyButton". In C# and in standard naming conventions fields should be named with camelCasing which means that the right name for MyButton should be myButton. The same thing for naming resources. Right now the naming is unclear and it differs within Silverlight and WPF and also between XAML and e.g. C#.

I think it is sad that Silverlight/WPF differs and I think it is important to create conventions for writing XAML. This is not about the functionality of the code you write, it is about the usability and the experience for the next developer that will read and try to understand your code. What do you think?

Friday, November 21, 2008

The Misuse of var in .NET - it's bad programming!

This post will argue that many .NET developers misuse implicit typing (var) in their programming. I see this more often and I really think this is really, really bad programming. This is why:

About implicit variables
Fist of all, what does the documentation say about var?
var keyword[C#]:
"Variables that are declared at method scope can have an implicit type var. An implicitly typed local variable is strongly typed just as if you had declared the type yourself, but the compiler determines the type. The following two declarations of i are functionally equivalent:
var i = 10; // implicitly typed
int i = 10; //explicitly typed


Remarks
Overuse of var can make source code less readable for others. It is recommended to use var only when it is necessary, that is, when the variable will be used to store an anonymous type or a collection of anonymous types." Many developers do not read the remarks text and I can also add that if you are looking at var [C#] instead of the var keyword [C#] this warning is less obvious. So when should you use it?

How to use var
var is a way of implicitly create a type, an temporary anonymous type. Note that this is not the same as variant in other languages. This means that the variable is still typesafe and can not change its type. For example the variable "i" in var i=10; can not be set to i="foo";. When declaring "i" we will implicitly say that i is an int. var is powerful for example when we use LINQ. It is a way of letting .NET help us create a temporary type for us (it is often temporary since it can only be used for local variables).
var somePerson = new { SomeProperty1 = 10, SomeProperty2 = "Foo" };

var persons1
= from p in Person
where p.Age == 30
select p.Name;

var persons2
= from p in Person
where p.Age == 30
select
new { p.Name, p.Age, p.EyeColor };


In persons1 the type will be a string (if p.Name is a string) and in persons2 it will be a temporary type containing name, age and eye color. This is a ok syntax and it is also a very powerful feature. Implicit typing can also be used in lambda expressions but sometimes I think it makes the code unreadable. What about my rage against var?

How not to use var!
A colleague of mine has a motto that says: "Any fool can write code that a computer can understand. Good programmers write code that humans can understand." In a time where usability and collaboration with people is key features you must write code that anyone can understand and that is self-explaining. Lately I have see more and more misuse of var and here are some examples of misuse:
var sample1 = 10; // Why not just type int? Maybe I really wanted a double?
var sample2 = GetPersonName(person); // What will be returned, an object, a string?
var sample3 = someReference.DoSomethingReallyFancy<ReallyStrangeObject>(); // Same as above!
var sample4 = new MyClass(); // Maybe ok?


The first sample is just stupid and makes the code hard to read. As the comment say, maybe you really wanted a double but forgot the ".0", this can be hard to see in debugging a calculation. In sample2 you really have no clue what type of object the method is returning. Sure you have intellisense but you should NEVER have to use intellisense to read code, maybe you are in an editor without intellisense. Sample3 is the same as sample2 but in a more complex format. I see this a lot and I hate it! Sample4 is not my favorite but it can be ok if you have a really long class name. In this samploe you can see the type in the declaration. I see a small risk here and that is if you refactor sample4 to a factory or some method, then sample4 will be the same as sample2. In this short context these use of var might not seem to ugly, but try a method that only uses var to declare its variables and get all instances from other methods and then do some fancy stuff with it. I promise you that the code will be hard to read bot for you and especially for another developer.

I think this use of var is really bad programming and I think that developers that use this type of coding are bad developers writing bad code, so please stop the misuse of var! Please!

Wednesday, November 19, 2008

Oredev 2008 - First day

The first day of Öredev 2008 is at its end and it's really been a great day. I just love the exchange of knowledge and all the people you meet at the conference. Today the highlight were: meeting people, Glenn Block talking about Composite WPF/Silverlight and the keynote speaker Ted Neward talking about "The New Big Thing".

oredev2008

Friday, October 17, 2008

Seminar - Composite WPF

Dotway will present a seminar about Composite WPF in Stockholm, Malmö, Göteborg and Linköping, Sweden. Speaker will be my colleague George Bolsch. Composite WPF, former known as Prism, is a Composite Application Guidance for WPF and is a project from the Microsoft Patters & Practices team. This is a really interesting seminar about building scalable, modular applications in the Windows Presentation Foundation. George has a tremendous knowledge about .NET and is also a member of the Patters & Practices reference team. The seminar is free and you can register by sending an email to one of the addresses below.

Linköping 21/10 2008 (07.30-09.30) - linkoping at dotway.se
Stockholm 21/10 2008 (17.00-19.00) - stockholm at dotway.se
Göteborg 22/10 2008 (07.30-09.30) - goteborg at dotway.se
Malmö 23/10 2008 (07.30-09.30) - seminarie at dotway.se

Wednesday, October 8, 2008

Dotway.WPF - A library with WPF controls, effects and panels

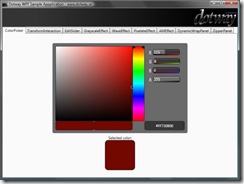
A first version of a WPF library has been published at CodePlex. It contains custom controls, pixel shader effects and custom panels. More functionality will be added later. Go to the project site and download source code or only the libraries. You can also download and try the sample application. Example of controls: color picker, editable slider, grayscale effect, pixelate effect, interaction controls, halftoning effect, a auto fitted wrap panel and more.
wpf1 
The sample application with a custom WPF control, a color picker much like the one in Expression Blend.

Tuesday, September 23, 2008

A Greeting Creator - Silverlight

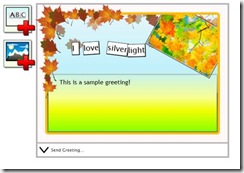
This is a reference to a project on CodePlex. It refers to a Silverlight 2 Beta 2 sample application (with source code) that will show solutions to a set of problems in Silverlight. E.g. creating custom controls, communicating with a WCF service, use replaceable GUI (templating), captcha functionality, creating custom panels, multi templated ListBox. 
greeting0
I hade the privilege to post one of my project at work on CodePlex. It is a Silverlight application where you in edit mode can create a greeting with text, images and magnetic poetry and then send it to your friends or save it to a database. The receiver can then read the message or you can embed your message on a web site. I had a lot of help from Johan Normén and Robert Folkesson in this project.
You find the project here!

Sunday, September 21, 2008

Scale, Move and rotate controls in your GUI - WPF

In this blog post I will describe and share a custom control in WPF (Windows Presentation Foundation) that you can use to encapsulate other WPF-controls. This control will add functionality so that you can move, rotate and scale your WPF-controls with your mouse. It also adds a control that will rasie an event (Click-event) when clicked. You can download a sample project with the control at the bottom of the page.

image

In the image above the red square is a control that will raise a click-event. The outer gray squares are for rotation and the inner ones are for scaling. In the middle the control can be moved (translated).

Background
In a previous post I did this control in Silverlight. This is the WPF version and I have made some adjustments and used some other solutions in this version. These will be described below.

Problem
Many times when you design an application you do not only want to present information to a user, you also want the user to interact with your program and your controls. Sometimes this interaction involves moving, scaling and rotating an object. I missed a simple control to wrap other controls in that would add this.

How does it work?
Feel free to compare this solution with the Silverligh version. To start with, this is a control that can be used as a container for other controls. This means that you do not have to modify any other code in your existing controls. This control just adds the ability to interact (move, scale and rotate) with your control.
To do this we need a bock of Transforms in our custom control:

<Grid.RenderTransform>
<TransformGroup>
<ScaleTransform ScaleX="{Binding RelativeSource={RelativeSource TemplatedParent}, Path=Scale}" ScaleY="{Binding RelativeSource={RelativeSource TemplatedParent}, Path=Scale}" />
<RotateTransform Angle="{Binding RelativeSource={RelativeSource TemplatedParent}, Path=Angle}"/>
<TranslateTransform X="{Binding RelativeSource={RelativeSource TemplatedParent}, Path=X}" Y="{Binding RelativeSource={RelativeSource TemplatedParent}, Path=Y}"/>
</TransformGroup>
</Grid.RenderTransform>

This is the first different to the Silverlight version. In Silverlight we used the PART_-convension and set the ScaleX, Angle etc. in code behind through these variables. We still have dependency properties in code behind but we don't need to have the reference to the Transforms. Instead we use a binding to our properties. The RelativeSource property is something that doesn't exist in Silverlight and therefore we need the PART_-solution in that example. In WPF we can solve the problem by using a binding and in that way we doesn't restrict us as much in the template. It also results in less code in code behind (a lot of code/logic is removed) and that will make this control simpler and easier to maintain.

The templates are much the same in WPF/Silverlight. One other difference than the binding is that the VisualStateManager doen't exist in WPF (but I think it will be implmeneted in future versions). I love the VisualStateManager and its separation between control and template. In WPF we instead put all the interaction controls in a Panel and then set the Visibility of that panel in code behind.

To get all the interaction working we hook up on mouse events in both our interaction controls (panels) and also in our base the custom control (inherited from ContentControl). When I first translated from Silverlight to WPF the whole control froze after the first interaction. The listeners for mouse event looks like this:
private void OnScaleControlsMouseLeftButtonDown(object sender, MouseButtonEventArgs e)
{
_previousPosition
= e.GetPosition(this);
this.CaptureMouse();
_iteractionMode
= InteractionMode.Scaling;
}

We call CaptureMouse() and in Silverlight this will be automatically released then the mouse button is released. In WPF we need to do this manually by setting:
private void OnControlMouseLeftButtonUp(object sender, MouseButtonEventArgs e)
{
_iteractionMode
= InteractionMode.None;
Mouse.Capture(
null);
}

With Mouse.Capture(null) the mouse will be released.

WPF also have more Cursors that we can use. We use more common cursors for moving and sizing which makes the interaction more intuitive.

image 
Code and sample project can be found here.

Saturday, September 20, 2008

Scale, Move and rotate controls in your GUI - Silverlight

In this blog post I will describe and share a custom control in Silverlight 2 that you can use to encapsulate other Silverlight-controls. This control will add functionality so that you can move, rotate and scale your Silverlight-controls with your mouse. It also adds a control that will rasie an event (Click-event) when clicked. You can download a sample project with the control at the bottom of the page.
image
In the image above the red square is the are that will raise a click-event when pressed. The outer squares at the other corners is controls for rotation and the inner squares are controls for scaling.

Problem
Many times when you design an application you do not only want to present information to a user, you also want the user to interact with your program and your controls. Sometimes this interaction involves moving, scaling and rotating an object. I missed a simple control to wrap other controls in that would add this.

How does it work?
A custom control in Silverlight and WPF is a control that contains some functionality and it is look-less. This means that you can change and switch the presentation of a control by changing its template. The base class chosen for this control is ContentControl and this base class is extremely powerful for encapsulating other controls (the content).
The functionality we want in this control is logic for clicking, moving, rotating and scaling. This includes listening to mouse-events of different kinds and the acting on those. What we need is some way of catching these events for the different type of transforms that we want to do.

<Grid x:Name="PART_TranslateControls">
<Rectangle Fill="Transparent" Cursor="Hand" />
</Grid>
<Grid x:Name="PART_ClickControls">
<Rectangle Fill="Red" Stroke="Black" Cursor="Arrow"/>
</Grid>
<Grid x:Name="PART_RotateControls">
<Rectangle Fill="DimGray" Stroke="Black"/>
</Grid>
<Grid x:Name="PART_ScaleControls">
<Rectangle Fill="LightGray" Stroke="DimGray"/>
</Grid>


The rectangles in the snippet above is only the appearance of the control and since we are listening to events from the panels we can set any look and feel of the clickable areas. Also not that we use the PART_ convention for creating custom controls.

In code behind, we add listeners for mousedown events for the different panels and calculates new position, rotation or size when the mouse is moved. The ContentControl contains a TransformGroup with a ScaleTransform, RotateTransform and a TranslateTransform which is the values that we are adjusting.

<TransformGroup>
<ScaleTransform x:Name="PART_Scale"/>
<RotateTransform x:Name="PART_Rotation" />
<TranslateTransform x:Name="PART_Translation" />
</TransformGroup>

We also have dependency properties that we can bind to in this control. The most beautiful solution for this would be to skip using PART_ for the transform and bind to the properties instead. The problem is that you can not bind to ScaleX, Angle, X etc. and therefore we need to get these parts in code-behind and then set the properties manually.

In the sample project below you can see all the mechanisms for this control.

image
Update 1: The sample code is now updated to Silverlight 2 RTW and I also added an sample of a transformable TextBox and functionality for ZIndex.
Update 2: The sample code has been updated. Hal9000Lives pointed out that the calculations for the rotation used the upper left corner as its center point. This has now been changed to use the middple point as center.
Code and sample project can be found here.

WPF-version of this control can be found here.

Thursday, September 4, 2008

How to use Sessions in WCF and Silverlight (basicHttpBinding)

I was writing a WCF Service for a Silverlight application and I needed to use Sessions in my WCF service to store some info. As you know Silverlight 2 (beta 2) only supports basicHttpBinding and therefore we can not use sessions as in wsHttpBinding. I wanted to write something like:

HttpContext.Current.Application.Add("MyKey", someInfo);

But HttpContext.Current returned null. After reading some threads in forums I found this workaround, make your WCF Service ASP.NET compatible:

1. Put this attribute on your WCF Sevice class: [AspNetCompatibilityRequirements(RequirementsMode = AspNetCompatibilityRequirementsMode.Allowed)]:

[AspNetCompatibilityRequirements(RequirementsMode = AspNetCompatibilityRequirementsMode.Allowed)]
public class MyService : IMyService
{
...
}

2. In your Web.config for your WCF Service project set:

<system.serviceModel>
<serviceHostingEnvironment aspNetCompatibilityEnabled="true"/>
</system.serviceModel>

This will make HttpContext.Current return something and you can now store your sessions. The difference I found in my solutions from some others is that I had a separate project for my WCF service than my ASP.NET web-project and that made the HttpContext fail.

Read more here: https://silverlight.net/forums/p/14175/57586.aspx

Thursday, June 19, 2008

WCF - The type name ServiceReference1 does not exist in the type Namespace.ClassName

This is a short blog post about a strange error when adding a WCF service reference. A WCF service was created and I wanted to add a service reference to a client project. I added the reference through Visual Studio and everything went fine until I compiled. Then I got this error:
Error    3    The type name 'ServiceReference1' does not exist in the type 'MyWorld.MyWorld' ...\Service References\ServiceReference1\Reference.cs

I found that this is caused by me having the same namespace name as class name (MyWorld.MyWorld = Namespace.ClassName). Change your namespace to a name that is not the same name as your class and this will compile.

Friday, June 13, 2008

Pixel Shader Wave Effect - Hit-testing in WPF Effect

In my previous post I wrote about a grayscale effect. That effect only changed the color of the GUI. In this post I will describe an effect that will apply a sine-wave effect on a GUI that will displace the controls. The cool thing is that the controls will still work with user interaction. This is quite simple and it is done by implementing an EffectMapping (GeneralTransform) in the ShaderEffect.
Download sample project here.
Download only WaveEffect.dll here.
You must have .NET Framework 3.5 sp1 or later installed for this to work. You also need DirectX SDK installed to be able to compile the pixel shader effect.

image

If you are interested in how pixel shaders work in WPF I refer to my previous post about the grayscale effect. In this post I will not write much about how pixel shaders work in general, but more about how to interact with a GUI after an effect has been applied. As I mentioned before there are different types of effects. An effect can modify the appearance of a GUI (e.g. grayscale, modify colors or contrast...) or it can apply an effect that will displace the controls from its original positions. The wave effect used in this example is an displacement effect that will apply a simple sine-wave to the GUI. Download the sample project above for source code.

1. The Sine-Wave Algorithm
The algorithm is quite simple and we will use it both in out shader file (HLSL-file) and also in our transform class. This is the math part:
Output.Y = Input.Y + (Math.Sin(Input.X * Frequency) * Amplitude);
Output.X = Input.X;
What is this? Ok, we will have some input, a x-value and a y-value, and then provide some output, a x-value and y-value. Think of them as coordinates in an image. In this example we only modify the y value and therefore the output x will be the same as the input x. We then calculate the y-value by taking the input y and add another value to it. The added value comes from a Sine-calculation meaning that it will be a +/- value. This also means that for a position y we will instead output a position above or below the input value, this will create the wave effect. In the Sine-calculation we have two properties that we can change to modify the appearance of the wave (amplitude and frequency).

2. WaveEffect : ShaderEffect
This is the C#-effect that we use in WPF and XAML. It it the interface toward the pixel shader and the GPU. The difference between this effect and the grayscale effect is that we have overridden a property called EffectMapping:

private WaveTransform _waveTransform = new WaveTransform();
protected override GeneralTransform EffectMapping
{
get
{
return _waveTransform;
}
}


We provide a customized transform class that inherits from GeneralTransform.


3. WaveTransform : GeneralTransform

This is out transform class that is associated with our pixel shader (WaveEffect.fx). When we apply the shader, we will displace the controls from their original positions. If we then try to mouse click the control where we see it on screen, we might actually miss is because in the logic of our program it is placed at a different location. The EffectMapping is here to help us. If we implement this mapping of positions, the framework can ask the transform class how the displayed position actually maps to the logical position. It is actually very simple, if the user clicks at screen position x,y, the framework asks the transform-class: -Hey, where is this position in my logical world?


Note that we can not create a pixel shader that is created from total random numbers (noise) and at the same time apply interaction logic. In other words, there are a very strong relation between the pixel shader and the transform. First look at our pixel shader:


sampler2D implicitInput : register(s0);
float frequency : register(c0);
float amplitude : register(c1);

float4 main(float2 uv : TEXCOORD) : COLOR
{
uv.y
= uv.y + (sin(uv.x * frequency) * amplitude);
float4 color
= tex2D(implicitInput, uv);

return color;
}


And this algorithm corresponds to the algorithm in the following WaveTransform (see TryTransform, TransformBounds):

public class WaveTransform : GeneralTransform, ICloneable
{
public WaveTransform()
{ }

public static readonly DependencyProperty FrequencyProperty = DependencyProperty.Register("Frequency", typeof(double), typeof(WaveTransform), new PropertyMetadata(1.0), new ValidateValueCallback(IsValidFrequency));
public double Frequency
{
get { return (double)GetValue(FrequencyProperty); }
set { SetValue(FrequencyProperty, value); }
}

public static bool IsValidFrequency(object value)
{
double checkValue = (double)value;

if (checkValue < 0.0)
{
return false;
}

return true;
}

public static readonly DependencyProperty AmplitudeProperty = DependencyProperty.Register("Amplitude", typeof(double), typeof(WaveTransform), new PropertyMetadata(0.2), new ValidateValueCallback(IsValidAmplitude));
public double Amplitude
{
get { return (double)GetValue(AmplitudeProperty); }
set { SetValue(AmplitudeProperty, value); }
}

public static bool IsValidAmplitude(object value)
{
double checkValue = (double)value;

if (checkValue < 0.0)
{
return false;
}

return true;
}

private bool _isInverse = false;
private bool IsInverse
{
get { return _isInverse; }
set { _isInverse = value; }
}

public override GeneralTransform Inverse
{
get
{
WaveTransform newWaveTransform
= (WaveTransform)this.Clone();
newWaveTransform.IsInverse
= !IsInverse;
return newWaveTransform;
}
}

/// <summary>
/// Transform a bounding box to/from Sin-wave.
/// </summary>
/// <param name="rect"></param>
/// <returns></returns>
public override Rect TransformBounds(Rect rect)
{
Rect boundingBox
= rect;

if (IsInverse)
{
boundingBox.Y
= rect.Y - Amplitude;
boundingBox.Height
= rect.Height + (2 * Amplitude);
}
else
{
boundingBox.Y
= rect.Y + Amplitude;
boundingBox.Height
= rect.Height - (2 * Amplitude);
}
return boundingBox;
}

/// <summary>
/// Transform a point to/from the Sin-wave. Use Inverse to get the inverse transformation
/// of the Sine-wave.
/// </summary>
/// <param name="inPoint"></param>
/// <param name="result"></param>
/// <returns></returns>
public override bool TryTransform(Point inPoint, out Point result)
{
result
= new Point();

if (IsInverse)
{
result.Y
= inPoint.Y + (Math.Sin(inPoint.X * Frequency) * Amplitude);
result.X
= inPoint.X;
}
else
{
result.Y
= inPoint.Y - (Math.Sin(inPoint.X * Frequency) * Amplitude);
result.X
= inPoint.X;
}
return true;
}

protected override Freezable CreateInstanceCore()
{
return new WaveTransform();
}

protected override void CloneCore(Freezable sourceFreezable)
{
WaveTransform newWaveTransform
= (WaveTransform)sourceFreezable;
base.CloneCore(newWaveTransform);
this.CopyCommon(newWaveTransform);
}

#region ICloneable Members

public new object Clone()
{
WaveTransform newWaveTransform
= new WaveTransform();
newWaveTransform.CopyCommon(
this);

return newWaveTransform;
}

#endregion ICloneable Members

private void CopyCommon(WaveTransform transform)
{
this.IsInverse = transform.IsInverse;
this.Frequency = transform.Frequency;
this.Amplitude = transform.Amplitude;
}
}


This is pretty much it. Now we have an effect that displaces the controls (WaveEffect.fx and WaveEffect.cs), but we also have a transform mapping (WaveTransform.cs) that makes it possible to interact with the displaced controls. How are we going to use this functionality? Well, I don't know yet, I haven't found a very good area for this, however... It is really cool!!! :)
I think we can use this for a maginfying glass/zoom effect and maybe for some focus-context stuff. In the final release of .NET 3.5 sp1, there will be some added functionality to this. One question that I have is if the pixel shader only works for Pixel Shader version 2.0 (ps_2_0). I tried to implement a mandelbrot effect but it failed due to the shader version. Does anyone know about this? I would like it to work with ps_3_0!

Thursday, June 12, 2008

Grayscale Effect - A Pixel Shader Effect in WPF

This post will describe how Effects (pixel shaders) are used in WPF. I will give a simple step-by-step example of a grayscale effect. You must have .NET Framework 3.5 sp1 or later installed for this to work. You also need DirectX SDK installed to be able to compile the pixel shader effect.

Download Sample Project and source code here.
Download effect here (add it to your project and use a grayscale effect on your WPF components)

image  image   image

1. New Project
Start Visual Studio and create a new WPF Application. (Targeting the .NET 3.5 Framework)

image

2. Add new project. (Targeting the .NET 3.5 Framework)
In your solution, add a new project, a Class Library-project. Name your project "GrayscaleEffect". Now you will have the following view in your Solution Explorer:

image

3. Prepare the Grayscale Effect.
First add some references to the GrayscaleEffect-project:
PresentationCore
PresentationFramework
WindowsBase
Delete the autogenerated Class1.cs-file and instead create a new C# class and name it "GrayscaleEffect.cs". This will be an empty class. Now lets add the C#-part of the effect:

using System;
using System.Windows.Media.Effects;
using System.Windows;
using System.Windows.Media;

namespace GrayscaleEffect
{
public class GrayscaleEffect : ShaderEffect
{
private static PixelShader _pixelShader = new PixelShader() { UriSource = new Uri(@"pack://application:,,,/GrayscaleEffect;component/GrayscaleEffect.ps") };

public GrayscaleEffect()
{
PixelShader
= _pixelShader;

UpdateShaderValue(InputProperty);
UpdateShaderValue(DesaturationFactorProperty);
}

public static readonly DependencyProperty InputProperty = ShaderEffect.RegisterPixelShaderSamplerProperty("Input", typeof(GrayscaleEffect), 0);
public Brush Input
{
get { return (Brush)GetValue(InputProperty); }
set { SetValue(InputProperty, value); }
}

public static readonly DependencyProperty DesaturationFactorProperty = DependencyProperty.Register("DesaturationFactor", typeof(double), typeof(GrayscaleEffect), new UIPropertyMetadata(0.0, PixelShaderConstantCallback(0), CoerceDesaturationFactor));
public double DesaturationFactor
{
get { return (double)GetValue(DesaturationFactorProperty); }
set { SetValue(DesaturationFactorProperty, value); }
}

private static object CoerceDesaturationFactor(DependencyObject d, object value)
{
GrayscaleEffect effect
= (GrayscaleEffect)d;
double newFactor = (double)value;

if (newFactor < 0.0 || newFactor > 1.0)
{
return effect.DesaturationFactor;
}

return newFactor;
}
}
}


This is the C# side of the effect and will be the interface to the shader effect. This class and its properties (dependency properties) can be used directly from WPF and XAML. Note that the properties can be animated in the same way as other dependency properties. The difference is that we use a special type for the Input property and for our custom property we just refer to a register on the GPU, but we really do not need to know that ;). I really love the simplicity!


4. Add the effect files.

In the GrayscaleEffect-project, add two new files (Add -> New Item). GrayscaleEffect.fx and GrayscaleEffect.ps as Text-file. Make sure that GrayscaleEffect.ps is set as a Resource (in Build Action) in Properties. NOTE: The GrayscaleEffect.fx must be in ANSI format. Convert it to ANSI by opening the file in Notepad and save it, select ANSI format in the save dialog.


5. Now open the GrayscaleEffect.fx and add the following code (this is HLSL - High Level Shader Language):


sampler2D implicitInput : register(s0);
float factor : register(c0);

float4 main(float2 uv : TEXCOORD) : COLOR
{
float4 color
= tex2D(implicitInput, uv);
float gray = color.r * 0.3 + color.g * 0.59 + color.b *0.11;

float4 result;
result.r
= (color.r - gray) * factor + gray;
result.g
= (color.g - gray) * factor + gray;
result.b
= (color.b - gray) * factor + gray;
result.a
= color.a;

return result;
}


This is our pixel shader. As we can see at the top implicitInput refers to one registry and a float named factor refers to another register. This is the register that we set in our C#-file (the last parameter in RegisterPixelShaderSamplerProperty(,,0) and the parameter in PixelShaderConstantCallback(0)). Below is our entry point the the shader file. We take a position as input and the first thing we do is to get the value in the "texture" at this position.


The magic below this is out grayscale alogrithm. We first create a grayscale value from the red, green and blue channel. Then we set this value in the output value depending on the factor parameter. The factor parameter is the DesaturationFactor in the C#-file and we use it to create a desaturation effect and a gradient between color and grayscale mode.


6. Compile the pixel shader.

We have created the pixel shader effect but we need to compile it to use it. Note that we can do this outside of Visual Studio, but we don't want that, so do the following. Open the project-properties for the GrayscaleEffect-project and select "Build Events". Under Pre-build event command line, add the following:


"$(DXSDK_DIR)Utilities\Bin\x86\fxc.exe" /T ps_2_0 /E main /Fo"$(SolutionDir)GrayscaleEffect/GrayscaleEffect.ps" "$(SolutionDir)GrayscaleEffect/GrayscaleEffect.fx"


If you now compile the project your effect should compile just fine. But we are not using it so lets use it:


7. Now in WpfApplication1.

First add a reference to the GrayscaleEffect-project from the WpfApplication1-project.


We also want to use some images that we can apply out effect on. NOTE that the effect is not limited to images, we can use any control or panel in WPF, and that's cool!!! However, we use images because they are nice ;). Add a folder the the WpfApplication1 called "images". Add a few (~4) images to this folder (Add -> Existing item), name them like img1.jpg, img2.jpg... .


Your Solution Explorer should look like this:


image 
Now add the following XAML to Window1.xaml:


<Window x:Class="WpfApplication1.Window1"
xmlns
="http://schemas.microsoft.com/winfx/2006/xaml/presentation"
xmlns:x
="http://schemas.microsoft.com/winfx/2006/xaml"
xmlns:effect
="clr-namespace:GrayscaleEffect;assembly=GrayscaleEffect"
Title
="Grayscale Effect - Dotway (www.dotway.se)" Height="400" Width="480">

<Window.Resources>

<DataTemplate x:Key="itemTemplate">
<Grid Width="225" Margin="3">
<Border BorderBrush="White" BorderThickness="2">
<Image Source="{Binding}" HorizontalAlignment="Center" VerticalAlignment="Center">
<Image.Effect>
<effect:GrayscaleEffect x:Name="grayscaleEffect"/>
</Image.Effect>
<Image.Triggers>
<EventTrigger RoutedEvent="Mouse.MouseEnter">
<BeginStoryboard>
<Storyboard>
<DoubleAnimation To="1.0" Duration="0:0:0.3" AccelerationRatio="0.10" DecelerationRatio="0.25" Storyboard.TargetName="grayscaleEffect" Storyboard.TargetProperty="(effect:GrayscaleEffect.DesaturationFactor)" />
</Storyboard>
</BeginStoryboard>
</EventTrigger>
<EventTrigger RoutedEvent="Mouse.MouseLeave">
<BeginStoryboard>
<Storyboard>
<DoubleAnimation To="0.0" Duration="0:0:4" AccelerationRatio="0.10" DecelerationRatio="0.25" Storyboard.TargetName="grayscaleEffect" Storyboard.TargetProperty="(effect:GrayscaleEffect.DesaturationFactor)" />
</Storyboard>
</BeginStoryboard>
</EventTrigger>
</Image.Triggers>
</Image>
</Border>
</Grid>
</DataTemplate>

</Window.Resources>

<Grid Background="Black">

<ItemsControl x:Name="myItemsControl" ItemTemplate="{StaticResource itemTemplate}">
<ItemsControl.ItemsPanel>
<ItemsPanelTemplate>
<WrapPanel />
</ItemsPanelTemplate>
</ItemsControl.ItemsPanel>
</ItemsControl>

</Grid>

</Window>


We have a ItemsControl that have a WrapPanel as layout panel. We also have a template for each item in the ItemsControl. In the template two triggers have been added with animations. These animations will animate the DesaturationFactor property which will affect the shader effect.

To use the images add the following to the code-behind file:


public Window1()
{
InitializeComponent();

List
<string> images = new List<string>();
for (int i = 0; i < 4; i++)
{
images.Add(
"images/img" + i + ".jpg");
}
myItemsControl.ItemsSource
= images;
}


Now just compile and run your new effect!

BUT, how is this really useful except that it gives us "pretty images". Well, I am a fan of focus and context/master-detail implementations. It is all about putting focus to some part of my GUI and leave the rest unfocused and in a context. With the color/grayscale we can put focus to an item by giving it color and all the rest (context) is grayscale. 
This is not the end of it. In a later post I hope I can show you how to interact with the GUI after applying a pixel shader effect. The only thing you have to do is to implement EffeceMapping in you C#-file, more on that later. 
I hope this will help someone, otherwise contact the consultants at Dotway (www.dotway.se)! ;)